Converse Beacon: Prototype Your Own Weather-Forecasting Sneakers

Via hackster.io
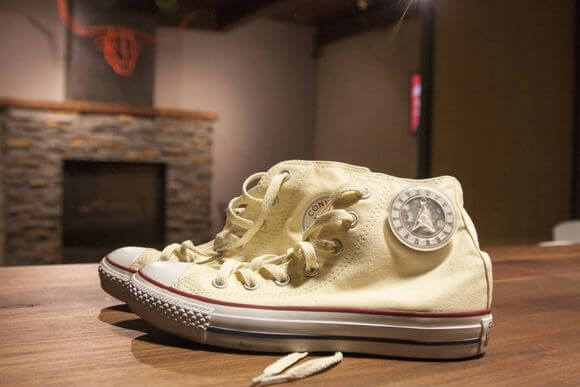
If you have been a regular visitor of the TechDesign blog, you may have noticed a particular section on our blog titled “Raw Tech.” What we cover in this section are some cool and interesting DIY projects shared by fellow makers online. We believe these self-initiated projects can always bring us back to drawing board and perhaps help to spark some new product ideas. A few weeks ago, TechDesign wrote a post about an IoT weather clock made by one fellow maker. Today TechDesign wants to bring you another project that is designed for a similar purpose but aims t0 be used in a different way. It is an LED beacon sewn onto Converse sneakers that come with weather-forecasting function. With no further ado, we invite you to explore the project details with us.
How is it made?
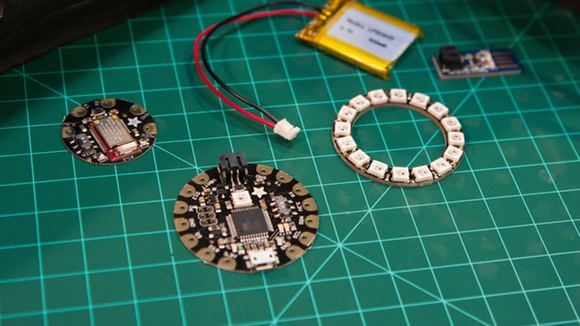
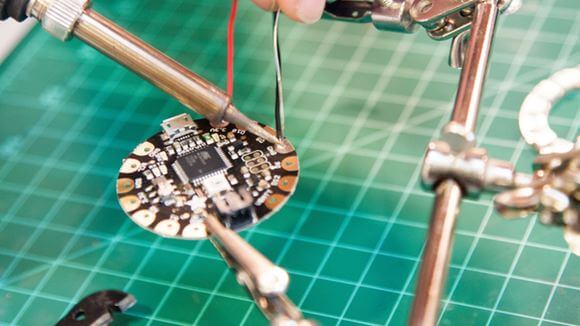
The Converse Beacon consists of the following components: an Arduino board, Bluetooth, and a NeoPixel ring. Its primary function is to forecast weather conditions for users. In case you wonder how it is assembled, you can refer to the project profile for step by step instruction. Once users complete assembling the components, they are advised to use glue (super or craft) to mount the NeoPixel to the Flora. Some help from tools like clamp can ensure the two parts are securely affixed.

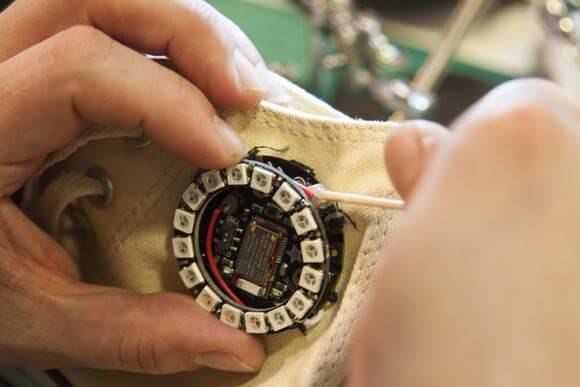
What follows is all about sewing the beacon onto the pair of Converse sneakers you have. Once the beacon is successfully sewn onto the sneakers, you should use glue to carefully secure all components again. The maker Jasper offers a good tip for ensuring all components are safely in place: place a dab under the Bluetooth module then affix the NeoPixel to the Flora. As an electronic design, the beacon, of course, requires batteries to function properly. Jasper suggests users open a small incision at the top of the beacon then attach the battery to a comfortable location inside the shoes. Lastly, users can design their own 3D-printed cover to beautify the whole beacon. That’s about it for the hardware part, but as a device that forecasts weather conditions, it also requires a corresponding software to function properly.

Getting the software in position
To install the Arduino software for the beacon, makers can download it from here. Once they launch the program, they should paste a specific set of URL (https://adafruit.github.io/arduino-board-index/package_adafruit_index.json) to the Additional Boards Manager URLs field then start going through the setup process. For complete instruction, makers can refer to the project profile.

For it to start performing its weather-forecasting function, users will have to connect it to a mobile device through Bluetooth. Once the connection is set up, users can start testing the beacon’s function and forecasting accuracy. To see it in full force, Converse prepares a cool video for all of us:
(Via Converse on Youtube)
If you are interested in learning about the project’s detail, you can refer to its project profile here.
We hope you find the project interesting and inspiring. If you ever have a cool project to share with us, please don’t hesitate to reach out to us.


