INSTALL DEVELOPMENT ENVIRONMENT FOR QUARK D2000– X86 MCU
![]()
(The original Chinese version of this article was written by Hsin-Yu Ho and published on MakerPRO)
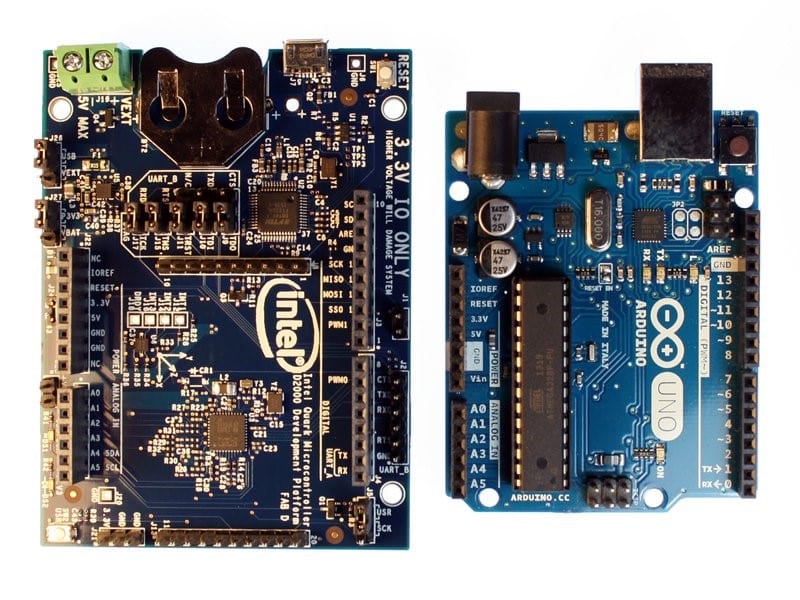
Since Arduino and Raspberry Pi have been broadly discussed, we would like to introduce another development environment: an IoT solution released from Intel—Quark D2000 Microcontroller Developer Kit.
There’s no doubt that the most distinguishing feature of Quark D2000 is being the first x86-based microcontroller. If you have computer-hardware-related knowledge or understand the history of computers, you would realize that x86 instruction set architecture plays an important role in the history of processors. And now x86 is finally adopted to the applications of MCU.
Other features of Quark D2000 include: moderate-sized circuit board, tremendous flexibility, flash storage, 6-axis compass and accelerometer with temperature sensor, Arduino Uno-like SIL sockets and Booster Pack-like SIL headers (only for 3.3V I/O).
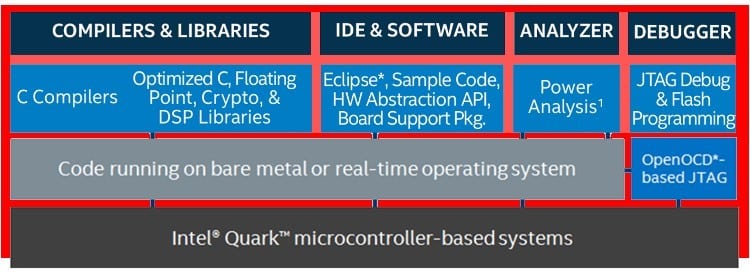
In addition, users can utilize USB interfaces on developer boards for programming and JTAG debugging. The integrated development environment (IDE) was provided by Intel System Studio for Microcontrollers, which is Eclipse-based and can be applied for developing, optimizing, and debugging applications. The development board is equipped with a coin cell battery holder. That is to say, the board can work with merely a coin battery.
Let us introduce the features of Quark D2000 and how to install the IDE.
Main Specifications
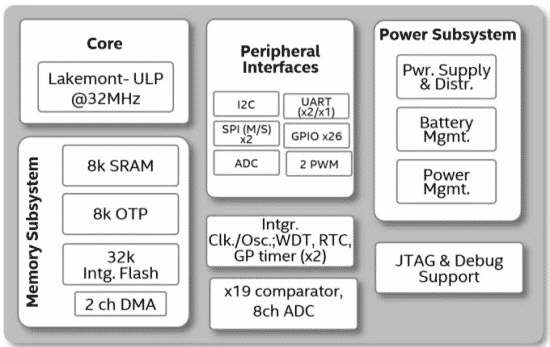
- Low-power battery-operated 32-bit microcontroller
- Ultra-low-power Intel Quark processor core running at 32 MHz
- 32 KB integrated flash and 8 KB SRAM
- 8 KB cache
- 2.0–3.3V operating voltage
- 6-axis accelerometer and compass with temperature sensor
- External power supply terminal block and coin cell battery holder
- Optimized power management and low-battery power
- 8 KB SRAM, 32 KB instruction flash, 8 KB OTP flash, and 4 KB data flash
- Intel Quark microcontroller software interface (Intel QMSI)
- Intel System Studio for microcontrollers SDK
Quark D2000 Development Environment
Quark D2000 is compatible with Arduino Uno R3 Shields; so you do not have to worry that the elements you purchased for Arduino (only 3.3V) will be useless if you’d like to use Quark D2000. However, D2000 is only compatible with shield boards but software. Thus, the sensor library of Arduino Shields will be unusable. To solve this issue, you can refer to the documents from this article provided by Intel.
With the built-in coin cell battery holder and low-battery power, D2000 has the superiority of quickly developing wearable devices. When developing wearable devices, developers often need to call accelerometer and compass from hardware. Unfortunately, D2000 doesn’t have the built-in gyroscope. If developers want to acquire posture data, they have to externally connect with other gyro chips.
In terms of peripheral interfaces, D2000 can not only support 6 frequently-used interfaces including I2C, UART, SPI, GPIO, PWM and ADC but also flexibly expand externally peripheral functions.
As to the software, the development software for D2000 is Intel System Studio for Microcontroller, which might be familiar to those who have developed Java or Android software. Intel System Studio IDE is Eclipse-based. D2000’s programming language, C/C++, is more difficult than Arduino’s. Compared with Arduino, D2000 has better efficiency in calling hardware for execution and better effect upon arranging memory.
Install Intel System Studio for Microcontroller
Developers have to install Intel IDE in D2000, just like installing Arduino IDE for Arduino to write source code. The following are the steps and sample code for installing Studio, which examines if our developer kits can work normally.
1. Please click this link, and select your operating system (Windows or Linux).
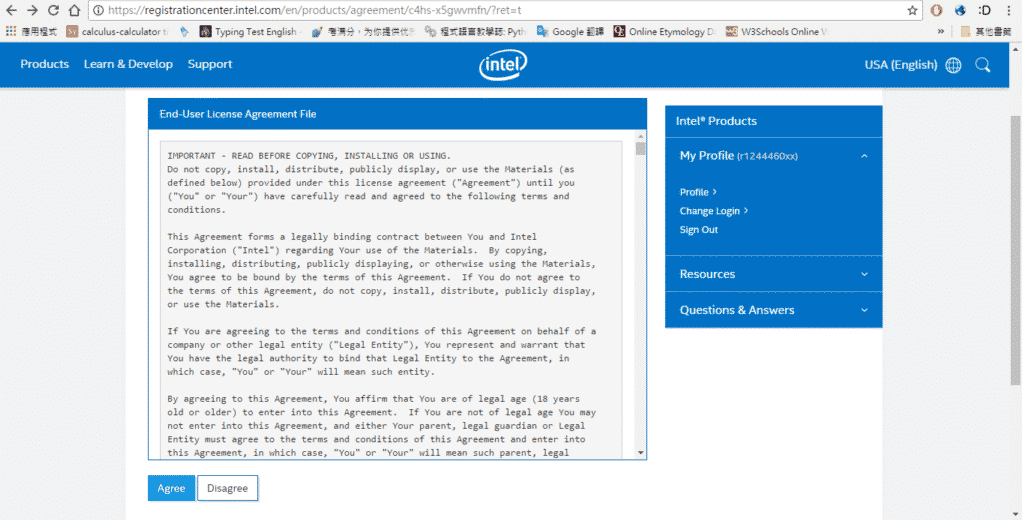
2. Apply for an Intel account, and then click “Agree”.
3. Select “2016 Update 1” in “Choose a version”, and click “Full Product”, it will start downloading.
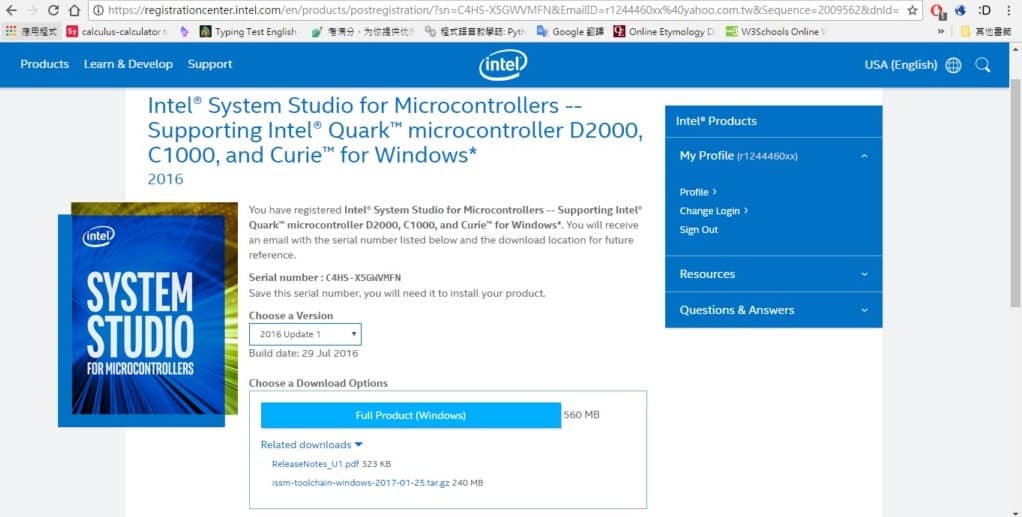
4. After downloading, you will see the interface as below.

Sample code 1—LED Blink
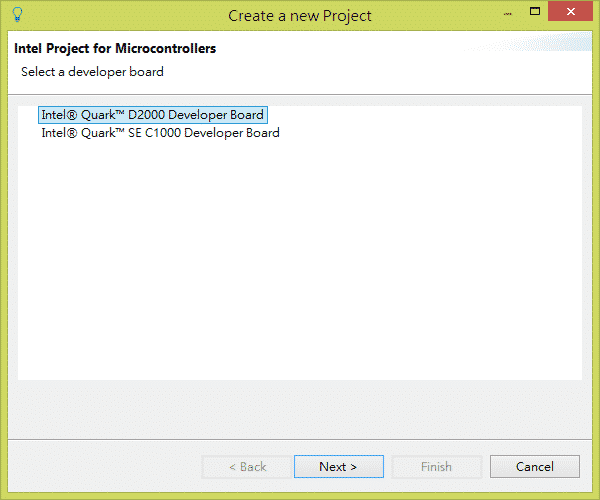
1. Click “New” in “File” (or click Alt, Shift and N simultaneously), and select “Intel Project for Microcontrollers”.

2. Select “Intel Quark D2000 Developer Board”, then click “Next”.
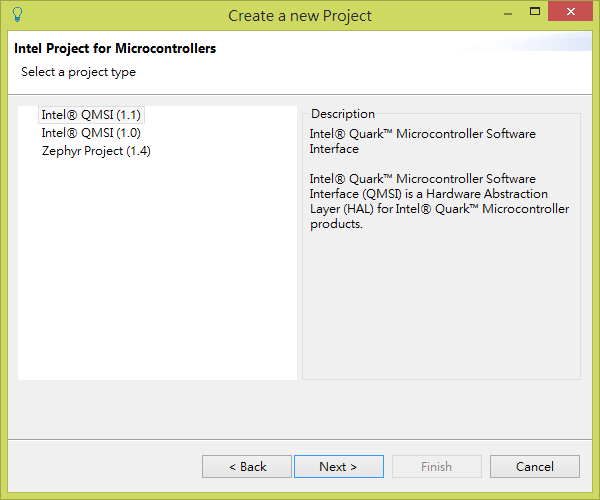
3. Select ”Intel QMSI(1.1)”, and then click “Next”.
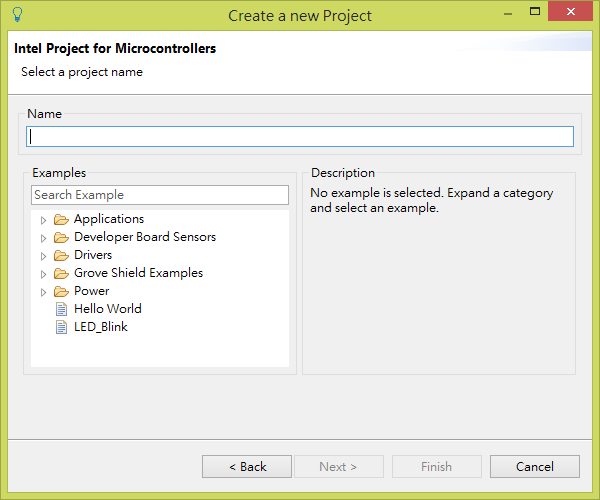
4. As what you can see, the default is “USB-Onboard”; so just click “Next”.

5. Select “Power” in the middle left, then select “LED_Blink” and click “Finish”.
6. Click the Hammer-like icon in the upper left. If there are no mistakes after debugging, click the play-like icon and write code for microcontroller. Check whether the light bulb icon is flashing. If so, it means that the code has successfully been written into D2000.


Conclusion
The specifications of Intel D2000 are fit for developing wearable devices and small IoT devices. With the built-in coin cell battery holder, it is unnecessary for developers to worry about assembling external heavy batter holder. As small devices have less hardware source than computers, the memory has to be fully used. It is quite appropriate to develop small devices with C/C++.
Moreover, D2000 has some built-in sensors that other development boards do not have. D2000 could be a good bargain and great developer kit as long as you conquer the coding difficulties. It is recommended for experienced makers to develop with D2000.
Read more about Intel Quark D2000:
![]()


Hi there, the whole thing is going nicely here and ofcourse every one is sharing facts, that’s really good, keep up writing.
Thanks for the feedback, we will keep it up!
Hi there, You have done a great job. I will certainly digg it and personally suggest to my friends. I’m sure they’ll be benefited from this site.
Thanks for the feedback, we will keep it up!
I was very pleased to find this website. I need to to thank you for your time for this particularly fantastic read!! I definitely appreciated every little bit of it and I have you saved to fav to look at new things on your site.
Thanks for the feedback, we will keep it up!
Wow, marvelous blog layout! How long have you been blogging for? you made blogging look easy. The overall look of your site is magnificent, as well as the content!
Thanks for the feedback, we will keep it up!
Hello! I simply want to offer you a huge thumbs up for the excellent info you have right here on this post. I’ll be returning to your site for more soon.