Get Started with IoT Visual Wiring Tool – Node-RED
(The original Chinese version of this article is written by Hsin-yu Ho and published on MakerPRO)
Now more and more makers who are enthusiastic about developing Internet of Things but lack of background knowledge would like to start their projects in the IoT field. These makers might have difficulties in writing the complicated codes, connecting with types of hardware, and popular social media. Meanwhile, it’s not easy for the makers to find the open API sources.
Now IBM releases the open source for visual wiring tool – Node-RED. Have you seen it before? Is it similar to the well-known programming language Node.js? No worries! Even if you have no idea about Node.js, you still can use Node-RED well. So let’s check out how to use Node-RED!
You might be curious that why the names, Node-RED and Node.js, are similar? Are they related to each other? We can explain it from Node.js. Node.js is the JavaScript runtime environment, which can be used to develop the webpage backend program. But developers need to write the Node.js command line by line. To call the codes more easily, IBM engineers developed Node-RED to complete the tasks with ease.
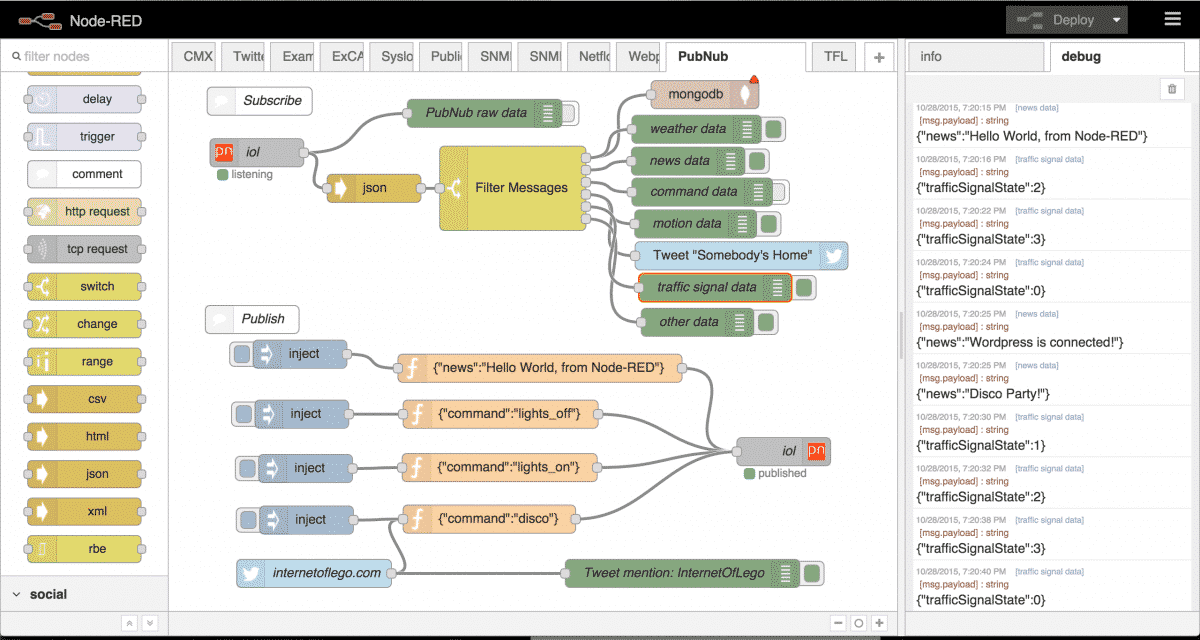
As the developer starts Node-RED, the background program will create a server to process the command the developer inputs. Meanwhile, you can use browsers to login with specific IP, and you will see the editor in Node-RED. You can set the workflow you need, and the program will convert the workflow into codes to Node.js to operate.
In maker community, the visual programming tools have been quite popular, especially Scratch developed by MIT and Blockly developed by Google. Compared with the 2 programming tools, does Node-RED have any advantages?
Features of Node-RED
Since 2013, Node-RED was a sub-product of IBM’s Emerging Technology Services group project. The engineers, Nick O’Leary and Dave Conway-Jones, would like to utilize a visual interface to prove the concept of MQTT applications so that Node-RED was developed.
Node-RED became a more comprehensive programming tool quickly and became Open Source in September 2013. In October 2016, Node-RED joined JS Foundation.
Node-RED provides types of API, including internet services, such as Twitter, and weather, call types of communication protocols, such as MQTT, TCP, UDP, etc. In embedded systems, Node-RED provides the functions to control GPIO and use MQTT and HTTP to communicate with cloud to construct IoT products.
The reasons why Node-RED is so popular in the social community:
1. Compared with coding, it is faster to develop with the visual interface.
2. Ideal development tool for proof of concept.
3. Easy-to-understand, and provide descriptions for each API.
4. Highly scalable; considerable library, flow, and node are available for users to download.
How to start with Node-RED
Before using Node-RED on Raspberry Pi, you need to install Node.js runtime environment first. If you use FRED or use Node-RED on IBM Bluemix, you don’t need to install the runtime environment.
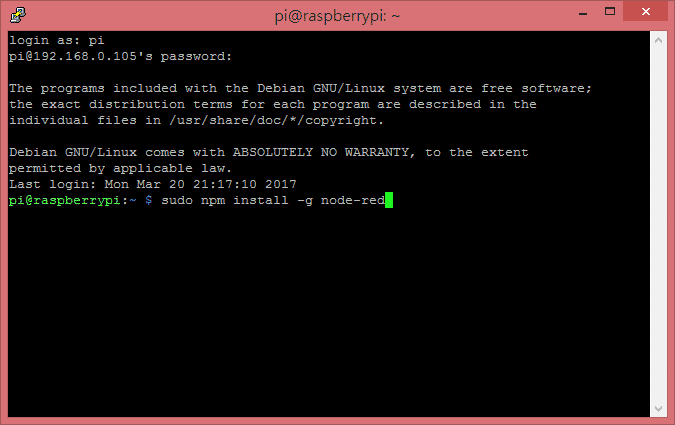
1. Install Node-RED: input “sudo npm install -g node-red” in Bash in Raspberry Pi.
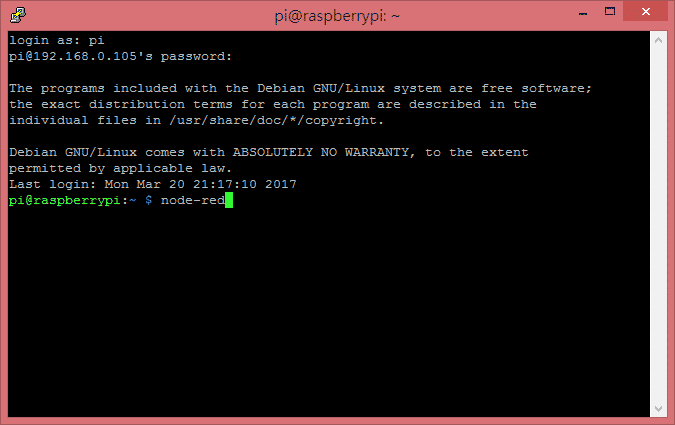
2. Launch Node-RED:
(1) input “node-red” in Bash
(2) Use remote desktop connection on computer (need to install xrdp on Raspberry Pi), open Linux browser to enter http://localhost:1880, and then you can enter the Node-RED editor.


Implementation Sample
1. Hello Node-RED
Let’s start with the basic unit of Node-RED, Node, and use Nodes to send the string “Hello Node-Red!” to say hi to NodeRED.
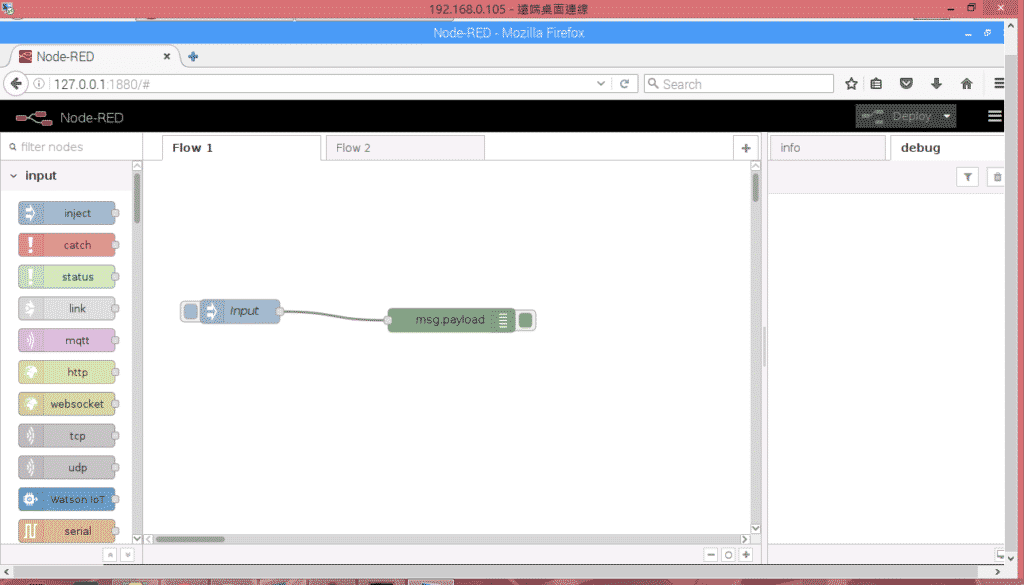
• Use inject and debug in the left column to construct the following flow
• Inject node: we can use the Node to input types of numerical values, such as variables, numbers, strings, time constants. A flow usually starts with an inject.
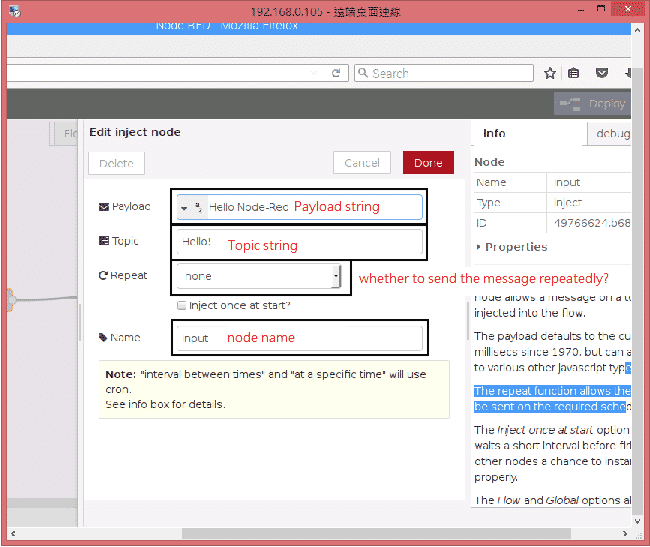
• Debug node: Node is like the oscilloscope probe, which shows the information of all the objects gathered in the node in the Debug column. We can use the Node to see if the result meets the expectation.
• Implementation result: click the blue button on node, the debug column will receive the input info.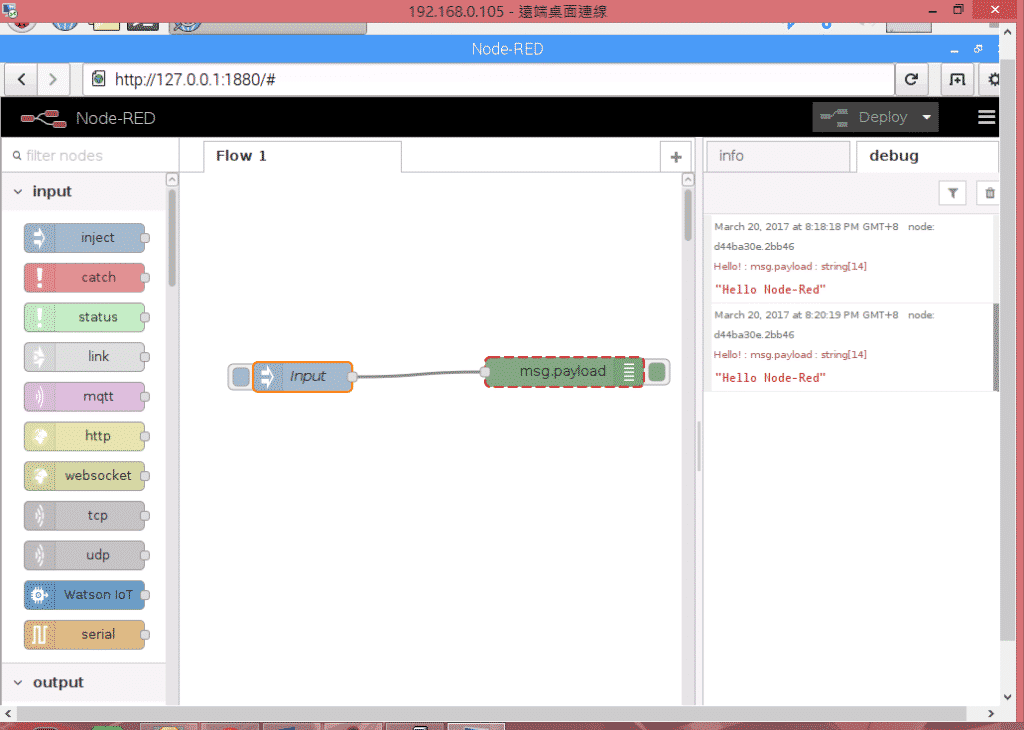
2. LED light switch
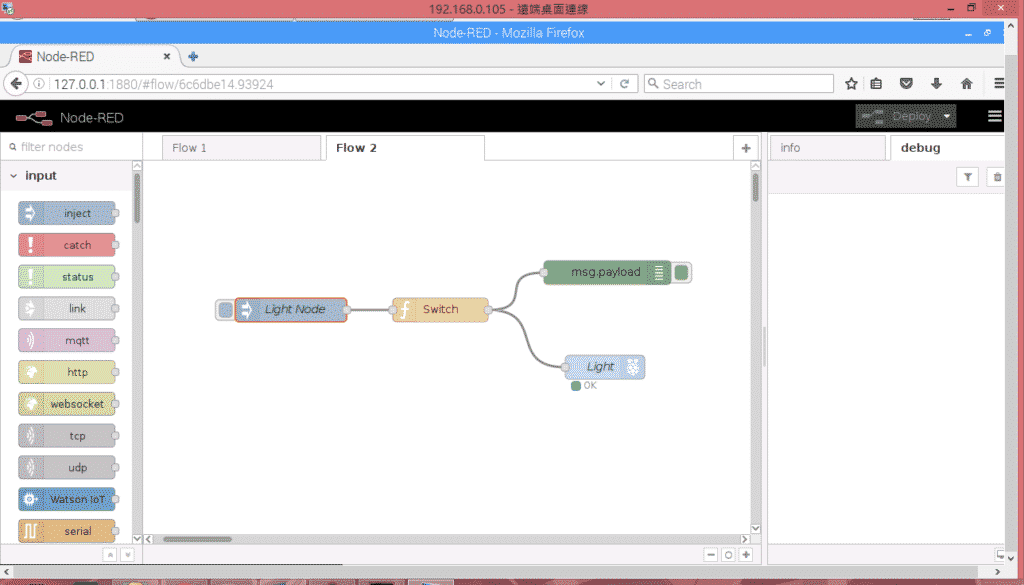
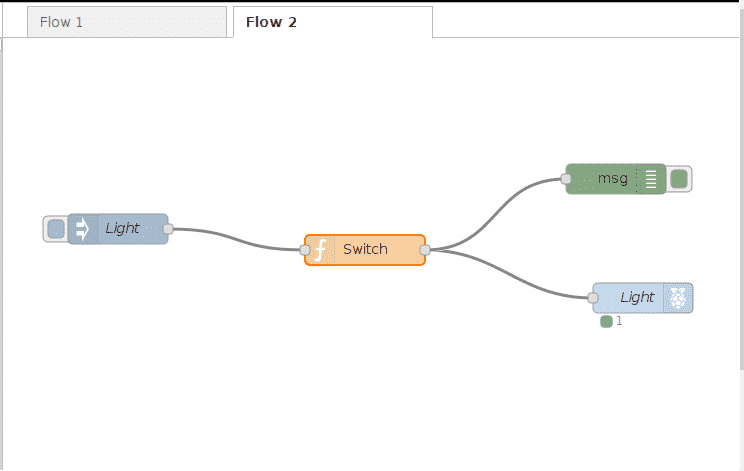
The key feature of Node-RED is to control Raspberry Pi easily. Developers used to use Python, C language, Java to call GPIO, but now developers can use Node-RED to achieve the same goal. You only need to enter the message of Turning On or Off in the flow. After the expression is being processed, 1 or 0 will be sent to RPi Pin node. (RPi node only in Raspberry Pi Node-RED by default)
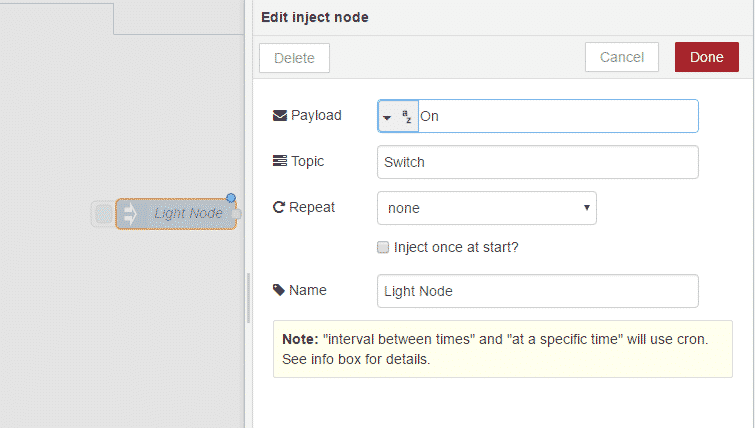
• Inject Node: Let’s set “On” for Switch function.
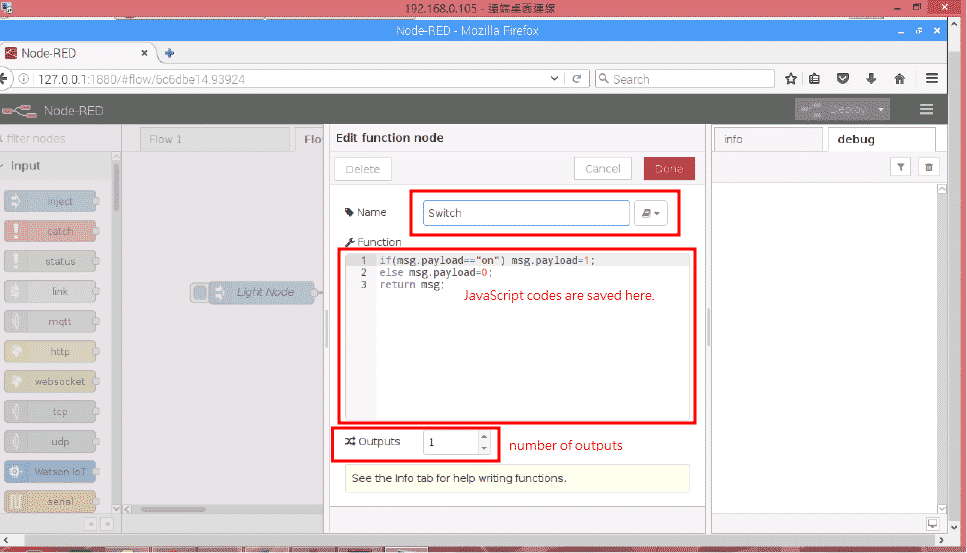
• Function Node: We use the Node as custom function and use JavaScript. We can have a simple expression here to check it’s On or Off, and then send the msg object.
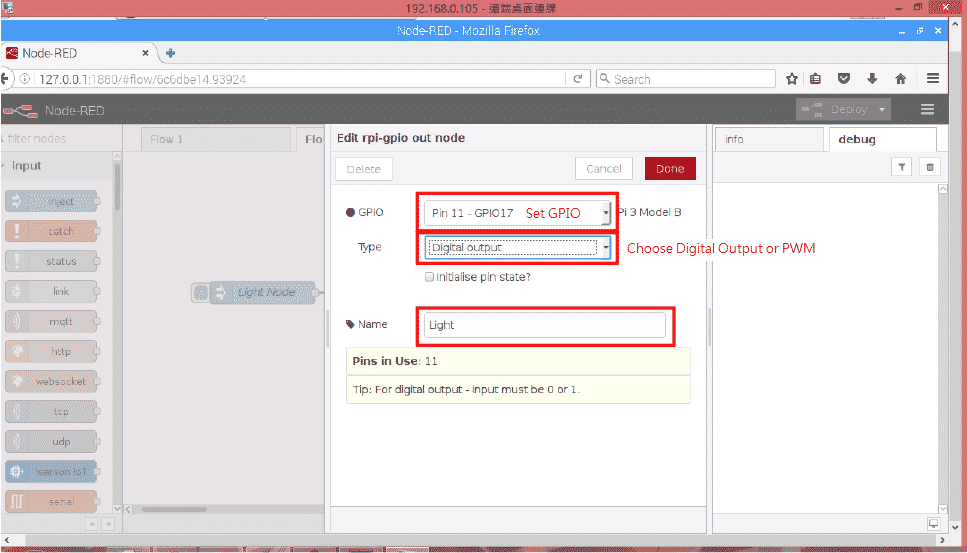
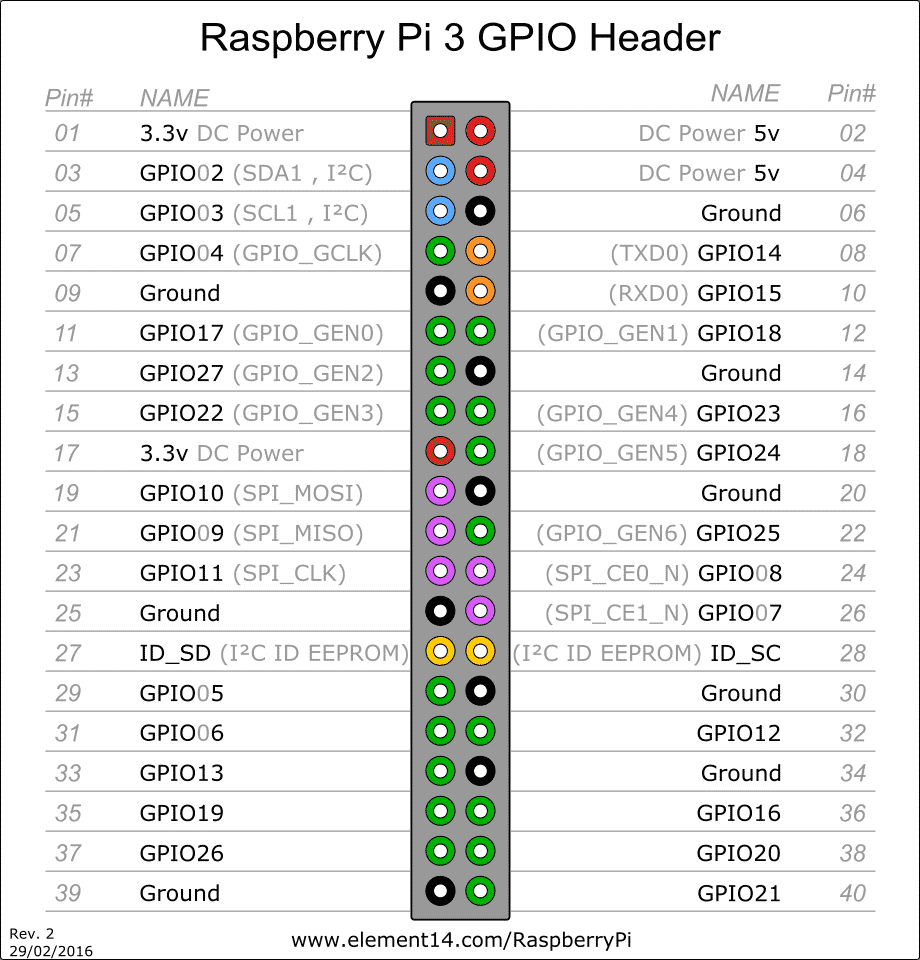
• RPi Pin node: We can use the Node as RPi pin output, for digital output and PWM. This time, we use it for digital output and choose GPIO17 pin.
• Raspberry Pi3 Pin Diagram:
• Implementation result:
Errors you may encounter
1. Cannot use npm command?
It might because you haven’t installed Node.js on Raspberry Pi. You need to install Node.js first to use npm.
2. Cannot display webpage in 0.01:1880?
You need to input “node-red” in Raspberry Pi terminal first to launch the server and log in.
3. Cannot input code in Function Node?
It’s the bug in GNU/Linux built-in browser. It’s suggested to use FireFox browser.
Conclusion
We’ve had the basic introduction to Node-RED, and hope you’ll find it useful. Now Amazon Web Service (AWS), IBM Bluemix and FRED all provide Node-RED services. Hope the useful tool could be more commonly-used in maker community and help makers create more smart things!
Sign up to become TechDesign member and get the first-hand supply chain news.


